一、 实现Servlet接口(五个方法全部实现)
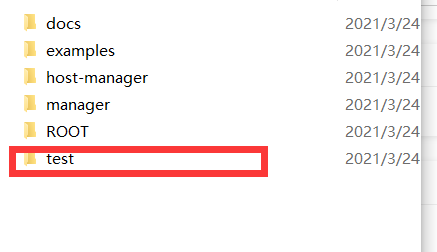
我们打开apache-tomcat文件夹所在的地方 并打开webapps
在webapps文件夹中 创建一个文件夹:我这里创建一个test的文件夹(这里可以随便取一个名字 相当于你的工程文件名)

打开新建的test文件夹 在创建一个WEB-INF文件夹

打开新建的WEB-INF文件夹 在创建一个classes文件夹 和一个web.xml文件

打开新建的classes文件夹并创建一个java文件 命名为 MyServlet.java

代码如下:
package com.gyu;
import javax.servlet.*;
import java.io.*;
import java.lang.*;
public class MyServlet implements Servlet
{
    private int count=0;
    public void destroy()
    {
    }
    public ServletConfig getServletConfig()
    {
        return null;
    }
    public java.lang.String getServletInfo()
    {
        return null;
    }
    public void init(ServletConfig config)
              throws ServletException
        {
            System.out.println("init...");
        }
    public void service(ServletRequest req,
                        ServletResponse res)
                 throws ServletException,
                        java.io.IOException
    {
        String ip=req.getRemoteAddr();
        String name=req.getParameter("name");
        java.io.PrintWriter out = res.getWriter();
        out.write("hello java"+"ip="+ip+"name="+name);
        count++;
        System.out.println("service..."+count+"   ip="+ip+"name="+name);
    }
}
MyServlet.java 创建完成 以后 就用javac来编译
进入到MyServlet.java的目录使用 javac –d . MyServlet.java

编译没有报错 就证明编译完成啦:
这个时候我们需要怎么去访问这个文件呢
我们就开始配置 web.xml 文件
web.xml内容如下:
<?xml version="1.0" encoding="UTF-8"?>
<!--
  Licensed to the Apache Software Foundation (ASF) under one or more
  contributor license agreements.  See the NOTICE file distributed with
  this work for additional information regarding copyright ownership.
  The ASF licenses this file to You under the Apache License, Version 2.0
  (the "License"); you may not use this file except in compliance with
  the License.  You may obtain a copy of the License at
      http://www.apache.org/licenses/LICENSE-2.0
  Unless required by applicable law or agreed to in writing, software
  distributed under the License is distributed on an "AS IS" BASIS,
  WITHOUT WARRANTIES OR CONDITIONS OF ANY KIND, either express or implied.
  See the License for the specific language governing permissions and
  limitations under the License.
-->
<web-app xmlns="http://xmlns.jcp.org/xml/ns/javaee"
  xmlns:xsi="http://www.w3.org/2001/XMLSchema-instance"
  xsi:schemaLocation="http://xmlns.jcp.org/xml/ns/javaee
                      http://xmlns.jcp.org/xml/ns/javaee/web-app_4_0.xsd"
  version="4.0"
  metadata-complete="true">
  <display-name>Tomcat Documentation</display-name>
  <description>
     Tomcat Documentation.
  </description>
  <servlet>
        <servlet-name>MyfirstServlet</servlet-name>
        <servlet-class>com.gyu.MyServlet</servlet-class>
  </servlet>
  <servlet-mapping>
        <servlet-name>MyfirstServlet</servlet-name>
        <url-pattern>/abc</url-pattern>//访问的时候 我们就只需要输入:http://localhost:8080/test/abc
  </servlet-mapping>
</web-app>
启动 apache-tomcat 服务器:bin->startup.bat
访问 :http://localhost:8080/test/abc 这个时候 我们就可以看见我们刚刚 写的MyServlet
浏览器上显示如下图:

servlet 服务器上显示如下图:

这样开发Servle就完成啦。
总结
感谢各位博友的阅读 ,欢迎您们提出意见 让我们一起交流。感谢你们对CYBLOG的支持理解,本次讲解到此结束!


 赞
赞


